We now offer a way to use DevExpress Web Dashboard within your Blazor apps.
In this post I'll show you how to integrate the HTML JavaScript Dashboard into your Blazor applications. I'll focus on integration details and create a sample dashboard application as well.
Prerequisites
Here’s what you’ll need to use our HTML JavaScript Dashboard with the Blazor framework:
- Visual Studio 2019 with the ASP.NET and Web Development workload
- .NET Core 3+ Framework
- DevExpress Universal Subscription
Source Code
You can find the source code of the sample below on GitHub.
How to Add Dashboard Control to Blazor
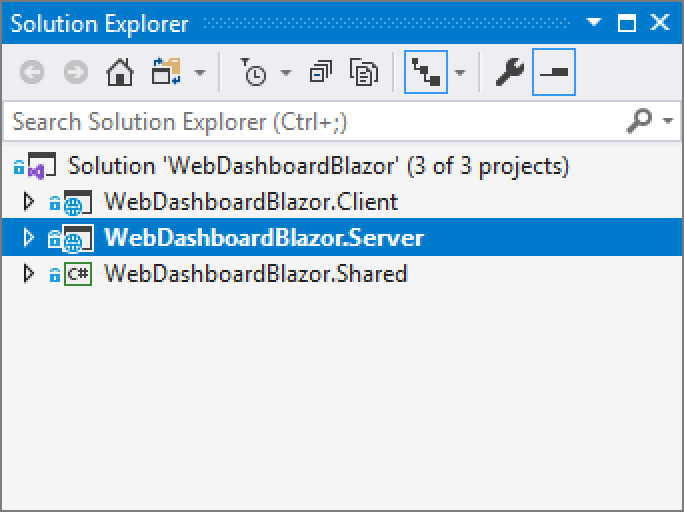
To get started, you must first create a new Blazor application using the Blazor WebAssembly App template and enable the ASP.NET Core hosted check box (or run dotnet new blazorwasm –hosted command). If this template was not installed, please review the following document: Get started with ASP.NET Core Blazor.
This solution uses the ASP.NET Core backend (server-side Blazor) to process requests from the HTML JS Dashboard. The client side defines the UI for this component and the logic needed to respond to UI updates.

Configure the Server Project
- Install the
DevExpress.AspNetCore.DashboardNuGet package. You can find a comprehensive installation guide in our documentation: Install DevExpress Controls Using NuGet Packages. - Create the App_Data/Dashboards folder to store dashboards.
- Install the
Microsoft.AspNetCore.Mvc.NewtonsoftJsonNuGet package to send the model to the client in JSON format. - Open the Startup.cs file to register and adjust DashboardConfigurator:
using DevExpress.AspNetCore;
using DevExpress.DashboardAspNetCore;
using DevExpress.DashboardCommon;
using DevExpress.DashboardWeb;
using DevExpress.DataAccess.Json;
// ...
public void ConfigureServices(IServiceCollection services) {
	services.AddResponseCompression(opts => {
		opts.MimeTypes = ResponseCompressionDefaults.MimeTypes.Concat(
			new[] { "application/octet-stream" });
	});
	services.AddDevExpressControls();
	services.AddMvc()
	.AddDefaultDashboardController(configurator => {
		// Register Dashboard Storage
		configurator.SetDashboardStorage(new DashboardFileStorage(FileProvider.GetFileInfo("App_Data/Dashboards").PhysicalPath));
		// Create a sample JSON data source
		DataSourceInMemoryStorage dataSourceStorage = new DataSourceInMemoryStorage();
		DashboardJsonDataSource jsonDataSourceUrl = new DashboardJsonDataSource("JSON Data Source (URL)");
		jsonDataSourceUrl.JsonSource = new UriJsonSource(new Uri("https://raw.githubusercontent.com/DevExpress-Examples/DataSources/master/JSON/customers.json"));
		jsonDataSourceUrl.RootElement = "Customers";
		jsonDataSourceUrl.Fill();
		dataSourceStorage.RegisterDataSource("jsonDataSourceUrl", jsonDataSourceUrl.SaveToXml());
		configurator.SetDataSourceStorage(dataSourceStorage);
	});
}

public void Configure(IApplicationBuilder app, IWebHostEnvironment env) {
	// ...
	app.UseStaticFiles();
	app.UseClientSideBlazorFiles<Client.Startup>();
	app.UseDevExpressControls();
	app.UseRouting();

	app.UseEndpoints(endpoints => {
		EndpointRouteBuilderExtension.MapDashboardRoute(endpoints, "api/dashboard");
		endpoints.MapDefaultControllerRoute();
		endpoints.MapFallbackToClientSideBlazor<Client.Startup>("index.html");
	});
}
Add the
package.jsonconfiguration file and list the following npm packages required by our Dashboard component:{ "dependencies": { // ... "devexpress-dashboard": "~19.2.5" "@devexpress/analytics-core": "~19.2.5", "devextreme": "~19.2.5", }, // ... }Run the
npm installcommand to install these packages.Create the Dashboard.razor file and add the code below to render the Web Dashboard:
@page "/dashboard"
@inject IJSRuntime JSRuntime
@implements IDisposable


    <div id="web-dashboard" style="width:100%; height: 600px">
    </div>

@code {
    protected override void OnAfterRender(bool firstRender) {
        JSRuntime.InvokeAsync<object>("JsFunctions.InitWebDashboard");
    }

    public void Dispose() {
        JSRuntime.InvokeAsync<string>("JsFunctions.DisposeWebDashboard");
    }
}
You should use the
OnAfterRenderlifecycle method for the dashboard component for initialization and theDisposemethod to release unused memory.Add the index.js file and implement the logic to initialize and dispose the components:
window.JsFunctions = {
    InitWebDashboard: function () {
        DevExpress.Dashboard.ResourceManager.embedBundledResources();
        this.dashboardControl = new DevExpress.Dashboard.DashboardControl(document.getElementById("web-dashboard"), {
            endpoint: "/api/dashboard"
        });
        this.dashboardControl.render();
    },
    DisposeWebDashboard: function () {
        this.dashboardControl.dispose();
    }
};
Install the
BuildBundlerMinifierNuGet package. Create a bundleconfig.json file to bundle scripts and styles required for Web Dashboard:[ { "outputFileName": "wwwroot/site/styles.css", "inputFiles": [ "node_modules/devextreme/dist/css/dx.common.css", "node_modules/devextreme/dist/css/dx.light.css", "node_modules/@devexpress/analytics-core/dist/css/dx-analytics.common.css", "node_modules/@devexpress/analytics-core/dist/css/dx-analytics.light.css", "node_modules/@devexpress/analytics-core/dist/css/dx-querybuilder.css", "node_modules/devexpress-dashboard/dist/css/dx-dashboard.light.min.css" ], "minify": { "enabled": false, "adjustRelativePaths": false } }, { "outputFileName": "wwwroot/site/bundle.js", "inputFiles": [ "./index.js", "node_modules/jquery/dist/jquery.js", "node_modules/jquery-ui-dist/jquery-ui.js", "node_modules/knockout/build/output/knockout-latest.js", "node_modules/ace-builds/src-min-noconflict/ace.js", "node_modules/ace-builds/src-min-noconflict/ext-language_tools.js", "node_modules/ace-builds/src-min-noconflict/theme-dreamweaver.js", "node_modules/ace-builds/src-min-noconflict/theme-ambiance.js", "node_modules/devextreme/dist/js/dx.all.js", "node_modules/@devexpress/analytics-core/dist/js/dx-analytics-core.min.js", "node_modules/@devexpress/analytics-core/dist/js/dx-querybuilder.min.js", "node_modules/devexpress-dashboard/dist/js/dx-dashboard.min.js" ], "minify": { "enabled": false }, "sourceMap": false } ]Register the bundled resources in the index.html file:
<!DOCTYPE html>
<html>

<head>
    <meta charset="utf-8" />
    <meta name="viewport" content="width=device-width" />
    <title>WebDashboardBlazor</title>
    <base href="/" />
    <link href="css/bootstrap/bootstrap.min.css" rel="stylesheet" />
    <link href="css/site.css" rel="stylesheet" />
    <link href="site/styles.css" rel="stylesheet" />
</head>

<body>
    <app>Loading...</app>

    <div id="blazor-error-ui">
        An unhandled error has occurred.
        <a href="" class="reload">Reload</a>
        <a class="dismiss">🗙</a>
    </div>
    <script src="_framework/blazor.webassembly.js"></script>
    <script src="site/bundle.js"></script>
</body>

</html>
Modify the NavMenu.razor file to add the Dashboard item to the menu:
<div class="@NavMenuCssClass" @onclick="ToggleNavMenu">
    <ul class="nav flex-column">
        <li class="nav-item px-3">
            <NavLink class="nav-link" href="" Match="NavLinkMatch.All">
                <span class="oi oi-home" aria-hidden="true"></span> Home
            </NavLink>
        </li>
        <li class="nav-item px-3">
            <NavLink class="nav-link" href="dashboard">
                <span class="oi oi-list-rich" aria-hidden="true"></span> Web Dashboard
            </NavLink>
        </li>
    </ul>
</div>
Run and View Dashboard
Run the solution and view our sample in your browser:

Please test this example and share your thoughts in the survey at the end of this post.
Your Feedback Counts
As always, we welcome your feedback. Please take a moment to answer the following survey question so we can better understand your requirements regarding Web Dashboard in Blazor.